Bomb shelters are one of those things we’ll hopefully never have to use, but having one gives us peace of mind that we’re prepared for the worst — whether it be a war, nuclear disaster or economic collapse. In this guide, we’ll cover how bomb shelters work, how to build a bomb shelter, and reasons to consider getting one.
What Is a Bomb Shelter?
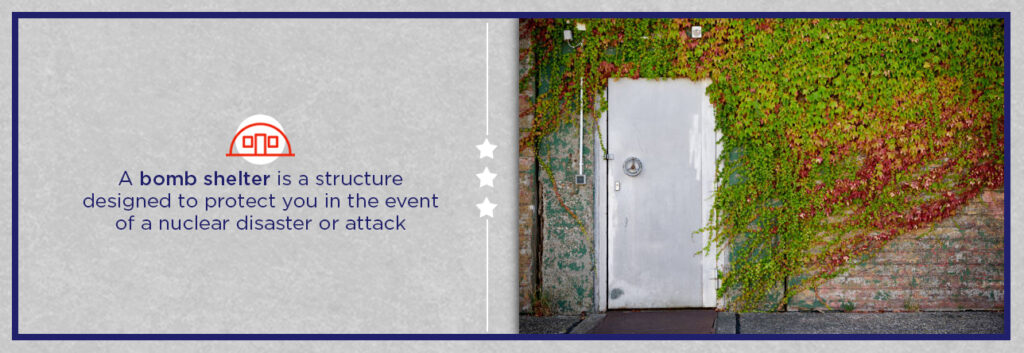
A bomb shelter is a structure designed to protect you in the event of a nuclear disaster or attack, although it can also protect against various natural disasters and other dangers. It is commonly buried underground and is made of steel, creating a temporarily live-able environment when it is too dangerous to go outside.
How Do Bomb Shelters Work?
A good bomb shelter meets the following criteria:
- Safe Distance from Fallout Particles: The effectiveness of a bomb shelter increases with its distance from fallout sources. A shelter in the basement of a home or office building, for instance, will protect you better than a shelter on the first floor as each layer of material above absorbs some radiation. If you’re planning to build a new structure, consider installing a bunker below the structure — each layer of the structure will absorb much of the radiation before it reaches the shelter, offering multi-layer protection.
- Dense and Heavy Shielding: The bomb shelter should have thick walls made of the densest, heaviest materials possible. The thickness of these materials is critical; for instance, 1 centimeter of lead, 6 centimeters of concrete, or 9 centimeters of packed earth can each halve gamma-ray radiation levels. United States Safe Room fallout shelters are designed to provide multiple layers of protection, including earth, concrete and solid-plate steel to limit radiation exposure.
- Abundant Space: Radioactive fallout is most harmful in the first few weeks, after which levels are diminished to a fraction of what they initially were. A sufficiently large safe room provides space for enough stock provisions to last you for several weeks, with a minimum requirement of 10 square feet per occupant and at least 6.5 feet of headroom.
- Blast-Resistant Shields or Doors: Specialized blast doors are designed to withstand the shockwave from a nuclear explosion. These blast shield and doors can flex and return to their original shape, maintaining the integrity of the shelter.
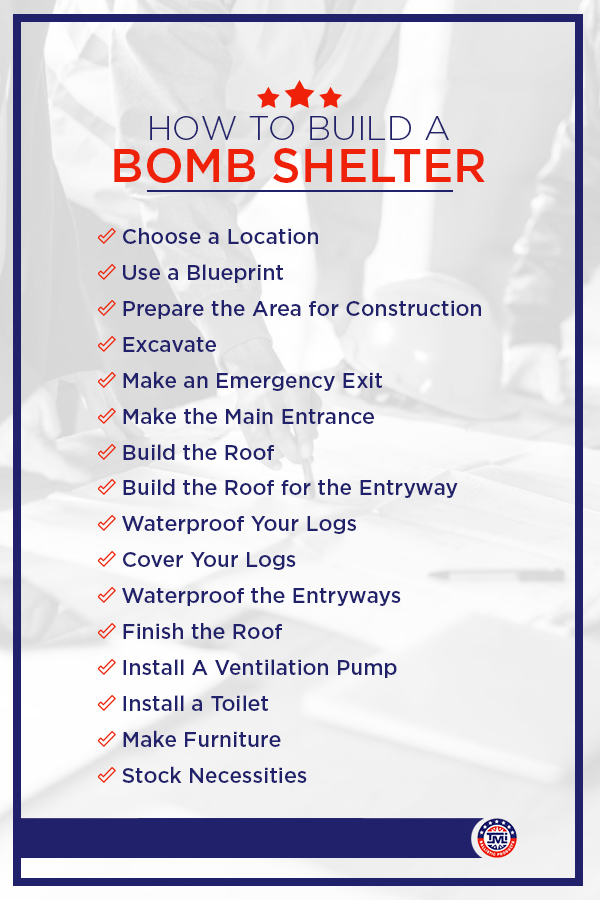
How to Build a Bomb Shelter
This section features a step-by-step guide for how to build a blast shelter. We will cover outside blast shelters first, which are commonly built using roofing logs and earth. This kind of shelter, which is often referred to as a pole-covered trench shelter, is completely waterproof and radiation-resistant if properly constructed.
The steps are as follows:
1. Choose a Location
When picking a place to build your shelter, consider the following factors:
- Stability: Your shelter should be on stable ground.
- Nearby structures: Pick a location that is far from any other trees or structures, especially flammable structures. The detonation of a nuclear weapon generates a thermal pulse that can cause structures several miles away to catch fire. You don’t want to be in a bomb shelter next to a burning structure.
- Water: The location you choose should not be at the bottom of a steep slope or downhill from a body of water.
- Utility lines: You should also know where all the utility lines run in your yard and avoid them.
2. Use a Blueprint
We recommend finding a blueprint for the shelter you want to build, as this will allow you to build an effective, stable shelter. There are three ways you can go about getting bomb shelter plans:
- Find one online: To find a basic plan, just search online for “fallout shelter blueprints.” Try to find a plan that includes step-by-step instructions for building your shelter.
- Hire a professional: You can also consult a drafter or architect, who can advise you on the kind of shelter you need. A building construction company should also be able to build you a shelter.
- Make one yourself: If you can’t find any plans online that you like and don’t want to spend money on a professional, you can sketch out your own bomb shelter design before building. When deciding on the size of your shelter, we recommend that you add a few feet to the length of the shelter for every person who will occupy it.
3. Prepare the Area for Construction
Once you have a plan, you can begin preparing your chosen location for construction. To prepare your site, you should first plot out the perimeter by planting some wooden stakes. Then, dig up any grass, rocks, trees or other debris using a shovel, ax or another similar tool.
4. Excavate
Now that you’ve cleared the area and outlined the perimeter, you can start excavating. Make sure to move the dirt several feet away from the stakes — you don’t the dirt falling back into the trench.
You can dig with a shovel, but this is tough, time-consuming work. For faster work, consider renting a backhoe from a local equipment rental company. Although expensive, this will dramatically speed up the excavation process, saving you lots of time.
5. Make an Emergency Exit
Be sure to create an emergency exit on the side of the trench that is opposite your main entrance. This emergency exit will also provide additional ventilation. Dig a crawl space that’s a few feet wide and deep. Then, to make an exit at the end, dig a smaller trench, which will connect your crawl space to the outside.
If you need to, you can make dirt steps to make it easier to reach the surface. To do this, pile dirt by the entryway, then start digging into it using a shovel, shaping the dirt into steps. Then, put some threshold board on top of each step, and connect them to sideboards using lag bolts.
6. Make the Main Entrance
Now, it’s time to dig another crawlway — this time, for the main entrance. It will be constructed the same way as with the emergency exit, although the entryway can be a bit wider, so you can enter the shelter more easily. Make sure the entryway is below ground.
7. Build the Roof
The next step is to lay down wooden roofing poles over your trench. Roofing poles are long pieces of timber that you can buy from a lumber yard. The poles you buy should overhang your trench by a few feet on each side — this will greatly reduce the chance that they’ll collapse. Lay the poles across the width of your trench, pushing them as close together as you can to minimize gaps.
8. Build the Roof for the Entryway
Stack some poles in front of your entryways, so dirt doesn’t get in them. Lay several poles between the edge of the entryways and the trench. Then, tie them together using sturdy wire or rope, and bind them together with the closest poles that are hanging over your trench.
The poles will hold the dirt back when you make the ceiling of the shelter. If you don’t have poles over your entryway, dirt may slide into them.
9. Waterproof Your Logs
Lay a tarp or other plastic material over your logs to waterproof them. All gaps between the logs should be covered, so dirt and water won’t fall into your shelter. You can achieve this by buying a single tarp that’s big enough to cover your entire trench or by overlapping several smaller tarps. Cloth, clay, leaves and other similar materials can also be used to fill gaps.
10. Cover Your Logs
Once the logs have been thoroughly waterproofed, you can proceed to cover them using an earth dome. Start moving your excavated dirt back onto the logs, making sure no dirt leaks into the shelter below. While piling up the dirt, shape it into a round mound that stops just before the entrance of the shelter. The mound will make the roof’s shelter more stable and keep it from caving in.
Remember, the deeper the dome is, the more you’ll be protected from radiation. To make the walls of your bomb shelter thicker, place another plastic tarp over your dome and put more dirt on top.
11. Waterproof the Entryways
Make sure water doesn’t get into your entryways by doing the following:
- Pack down the dirt: Make sure to pack the dirt around the entrances.
- Create a barrier: Stack several sandbags or shorter poles around the entrances.
- Secure the barrier: Tie the sandbags or poles down tightly using wire or rope.
- Create slopes: Build dirt up around the poles or bags to create slopes. This will drive away water from your entryways. Make sure to build slopes on each side of both entryways, so no rainwater enters your shelter.
12. Finish the Roof
Next, you’ll want to hang some plastic canopies above your entryways, which will protect them from rainfall. Extend a tarp from your roof dome over your entryway. Then, sink several stakes into your dome and secure your tarp using strong wires or cords. Secure the tarp at the other end to the sandbags or logs in front of your entryway to waterproof the shelter even better.
Your tarp should be in the shape of a tent, so water will roll away from the shelter.
13. Install A Ventilation Pump
Your next step will be to put in a manual ventilation pump by your emergency exit. The filter should be placed on the floor by your emergency exit. The pipe should run along your crawl space and emerge above your canopy.
The pump you buy should have a hand-operated option. While the pump will likely run by itself in most cases, you’ll want to be sure you can operate in an emergency.
14. Install a Toilet
Be sure to create a toilet in a separate part of your shelter. When installing toilets, you have a number of options to choose from. Composting toilets are often the most efficient option. Keep in mind that another ventilation pipe will need to be installed, running from your toilet to the outside. We recommend installing the toilet by the exit that is farthest from where you’ll be sleeping.
When installing your ventilation pipe, try to run it through the closest entryway. This may require you to dig through the earth, so your pipe can exit above the canopy above your entryway. Another option is to join your pipe to the ventilation pipe of your air pump.
Shelters generally don’t have running water, which means you won’t be able to install the kind of toilet you’re used to. If you want to have clean, running water during an emergency, it’ll mean installing an elaborate, expensive system of pipes, filters and tanks.
You can also use buckets or small plastic toilets. While not ideal, this is a practical way to make sure your shelter stays sanitary and safe.
15. Make Furniture
Now, it’s time to make some beds and any other furniture you may need. In this type of shelter, we recommend using hammocks. You don’t need to buy big, bulky furniture. This is an opportunity to be creative. For instance, you could make beds by piling blankets. You could even pack together hay, pine needles or leaves to make a bed quickly and inexpensively.
16. Stock Necessities
Be sure to pack water, food and any other necessities. Your dry food supply should last a few weeks and consist of foods that require little preparation, like jerky, lentils, military MREs, etc. Don’t forget to bring trash cans, medical supplies and extra clothes, as well. Buy a high-quality first-aid kit with tape, bandages, scissors, splints and rubbing alcohol. You should also bring along any medications you require.
How to Make a Blast Shelter Inside Your Home
Another option when designing a blast shelter is to use an existing room in your house. Here are the steps:
1. Find a Room
Choose a room with concrete walls. The ideal location is in the basement, but any concrete room can be converted into a shelter. It’s also better to choose a room closer to the middle of your home because it will put more space between the shelter and the fallout.
2. Shield the Walls
The more you can reinforce your walls, the better you’ll be protected against the radiation. A common way to add protection is by stacking sandbags around windows and other places where radiation could leak in. Even makeshift materials such as mattresses, tables and even bags of clothes can add some protection.
If you would like your shelter to protect you against explosions, consider buying some blast shields, which are commonly used in a variety of industries to protect against bomb blasts or other explosions.
3. Stock Your Shelter
Stock up on food, water and other necessary items. We recommend stocking your shelter with bottled water and foods that don’t require much preparation. You should also include medical supplies and any necessary prescriptions. Don’t forget to include a sanitation bucket, as well.
4. Allow for Ventilation
Remember to create small vents near the entrances, so air can move freely. You should also consider using an air ventilation pump, which you might be able to hook up to existing ventilation pipes in your home.
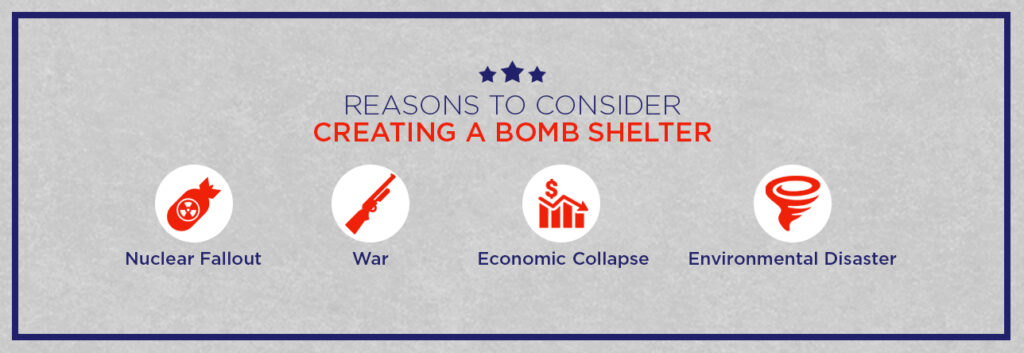
Reasons to Consider Creating a Bomb Shelter
Below are five reasons to consider building your own personal bomb shelter:
1. Nuclear Fallout
Protecting yourself from nuclear fallout is the most well-known benefit of bomb shelters, as they are designed primarily for this purpose. You may want to give extra thought to building a bomb shelter if you live in a high-risk zone. High-risk zones include areas near military bases, missile silos, shipyards, transportation hubs and high-tech industrial areas. Highly populated areas like New York City and Los Angeles are also considered high-risk.
2. War
Tensions remain high in certain places around the world, and if a war does break out, you may be very glad to have an underground shelter where you can seek refuge. If you live in or near one of these high-tension areas, consider building one sooner rather than later.
3. Economic Collapse
If the United States or another closely-related economy suffers a major economic collapse, social norms may start to break down. In such a situation, your bomb shelter could protect you from looters. Also, the food and water you have stockpiled there will be useful, as it may become hard to come by.
4. Environmental Disaster
Most of us live in a region that could experience some sort of natural disaster, whether it be hurricanes, tornados, earthquakes or floods. During such disasters, there is often a shortage of food, water, shelter and medical assistance — all of which your bomb shelter can provide for you.
Contact TM International, LLC for Blast Protection Solutions
If you or your business is in need of effective, safe and affordable blast mats, look no further than TM International, LLC — the top blast mitigation barrier supplier in the industry. Feel free to explore our products on our site or request a quote.